How to Build a Church Directory
This step-by-step guide covers organizing your data, setting up spreadsheets, adding info, linking between sheets, formatting, and sharing your finished church directory in Google Sheets.

Welcome to this step-by-step guide on creating a simple and easy-to-use church directory.
Having an up-to-date directory is essential for every church, but it can be a daunting task without the right system.
In this guide, we'll walk you through how to easily set up your church directory on Google Sheets. Whether you're starting from scratch or need to organize an existing paper directory, the following steps will make creating, managing, and sharing your church directory simple.
Follow these steps to get your full church community organized on Google Sheets.
Let's get started!
What is a Church Directory and Why is it Important?
A church directory is a comprehensive list of all the members, attendees, and staff of a church. It contains their contact information including names, addresses, phone numbers, emails, birthdays, and family members.
Having a church directory serves many crucial purposes:
- Helps build stronger connections and community among church members
- Allows staff and members to easily contact each other
- Provides a record of membership and involvement
- Enables outreach to members by mail or email
- Helps new members get to know other families
With a digital church directory on Google Sheets, this important information can be accessed anywhere and updated continually as the church grows and changes.
How to Build Your Instant Church Directory in Google Sheets
Here is a comprehensive step-by-step guide on how to build a church directory using Google Sheets:
Step 1: Organize Your Staff, Member, and Volunteer Information
First, make a comprehensive list of all the people you want to include in your directory. Gather their names, contact details, roles, and any other info you want to track.
- For members: this may include address, phone numbers, emails, birthdays, anniversary dates, family members, join date, small groups, interests, skills, and more.
- For staff: collect names, contact info, titles, departments, birthdays, hire dates, and other work details.
- For volunteers: gather names, contact info, volunteer roles, departments, skills, interests, and availability.
Organize this info into categories so you know what you want to capture and manage in your church directory.
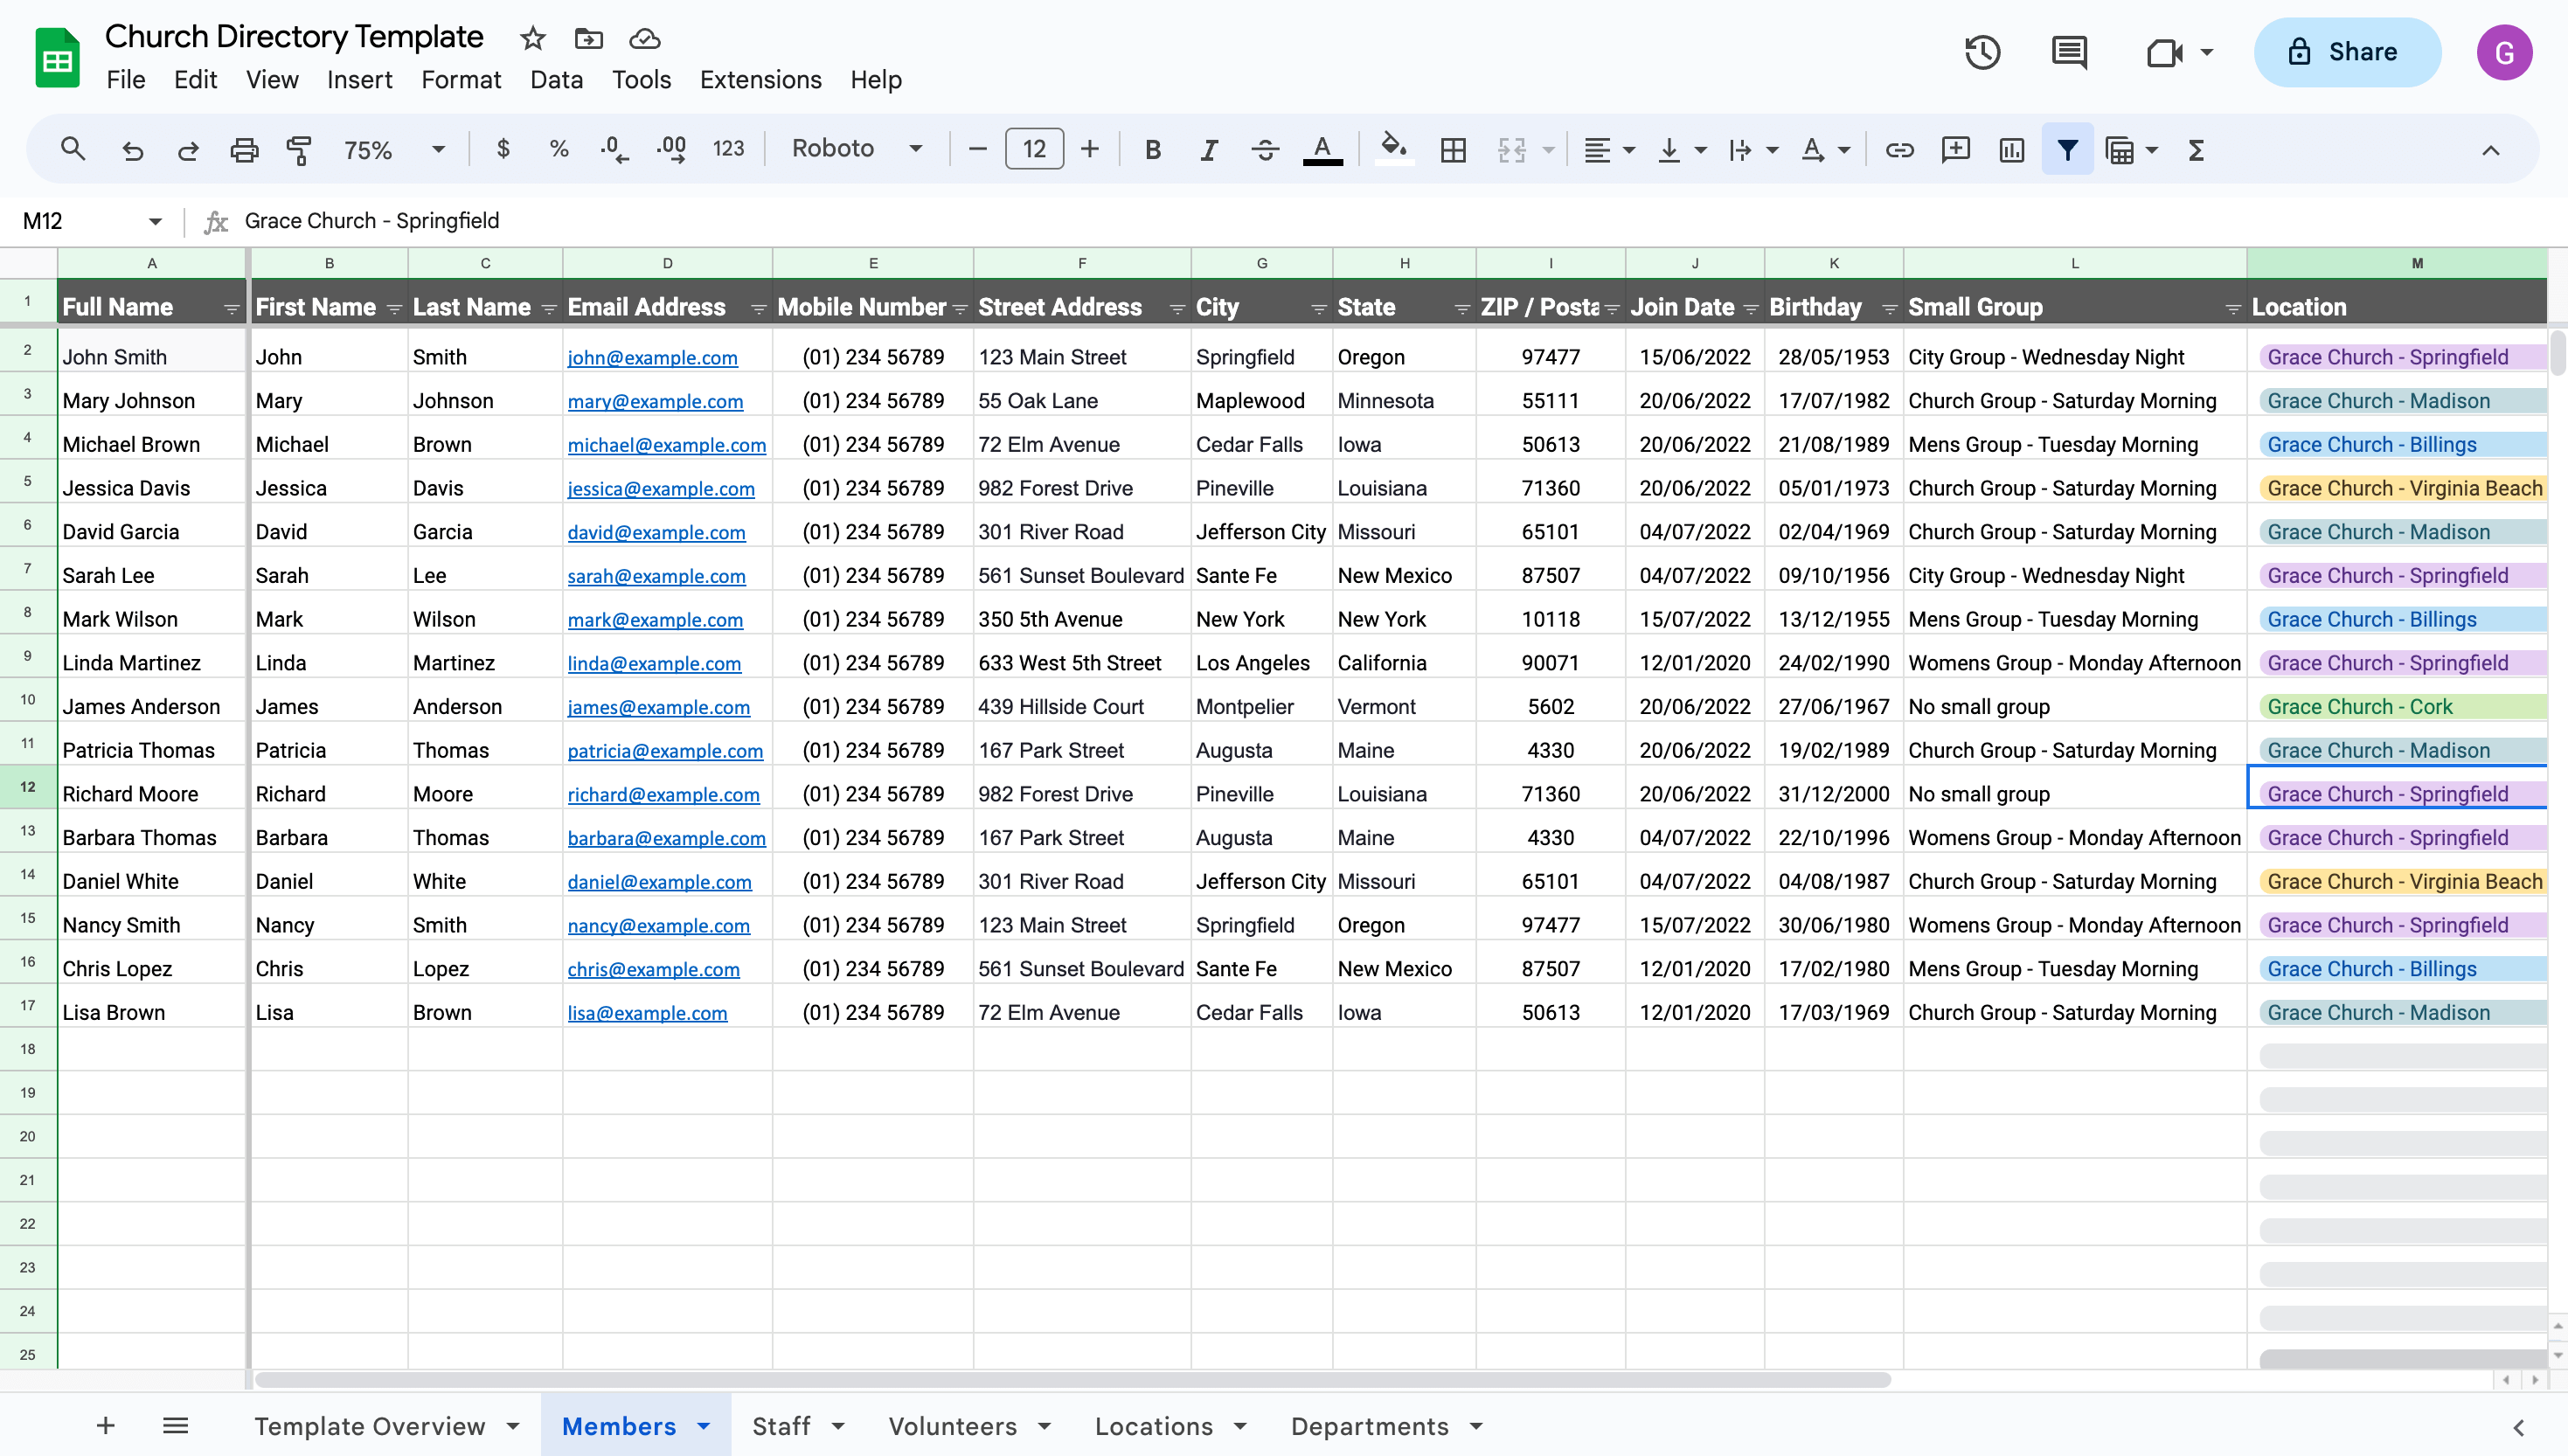
Step 2: Create a New Spreadsheet called "Members"
- Go to Google Sheets and log into your Google account.
- Open Google Sheets and create a new blank spreadsheet.
- Title it "Members Directory".
This will be the main spreadsheet where you store all your member records.
Add Column Headers for Members
- In cell A1 type "Full Name"
- In cell B1 type "First Name"
- In cell C1 type "Last Name"
- In cell D1 type "Email"
- In cell E1 type "Mobile Phone"
- In cell F1 type "Street Address"
- In cell G1 type "City"
- In cell H1 type "State"
- In cell I1 type "Zip Code"
- In cell J1 type "Birthday"
- In cell K1 type "Join Date"
- In cell L1 type "Small Groups"
- In cell M1 type "Location"
This creates column headers for the key pieces of information you want to track for each congregation member.
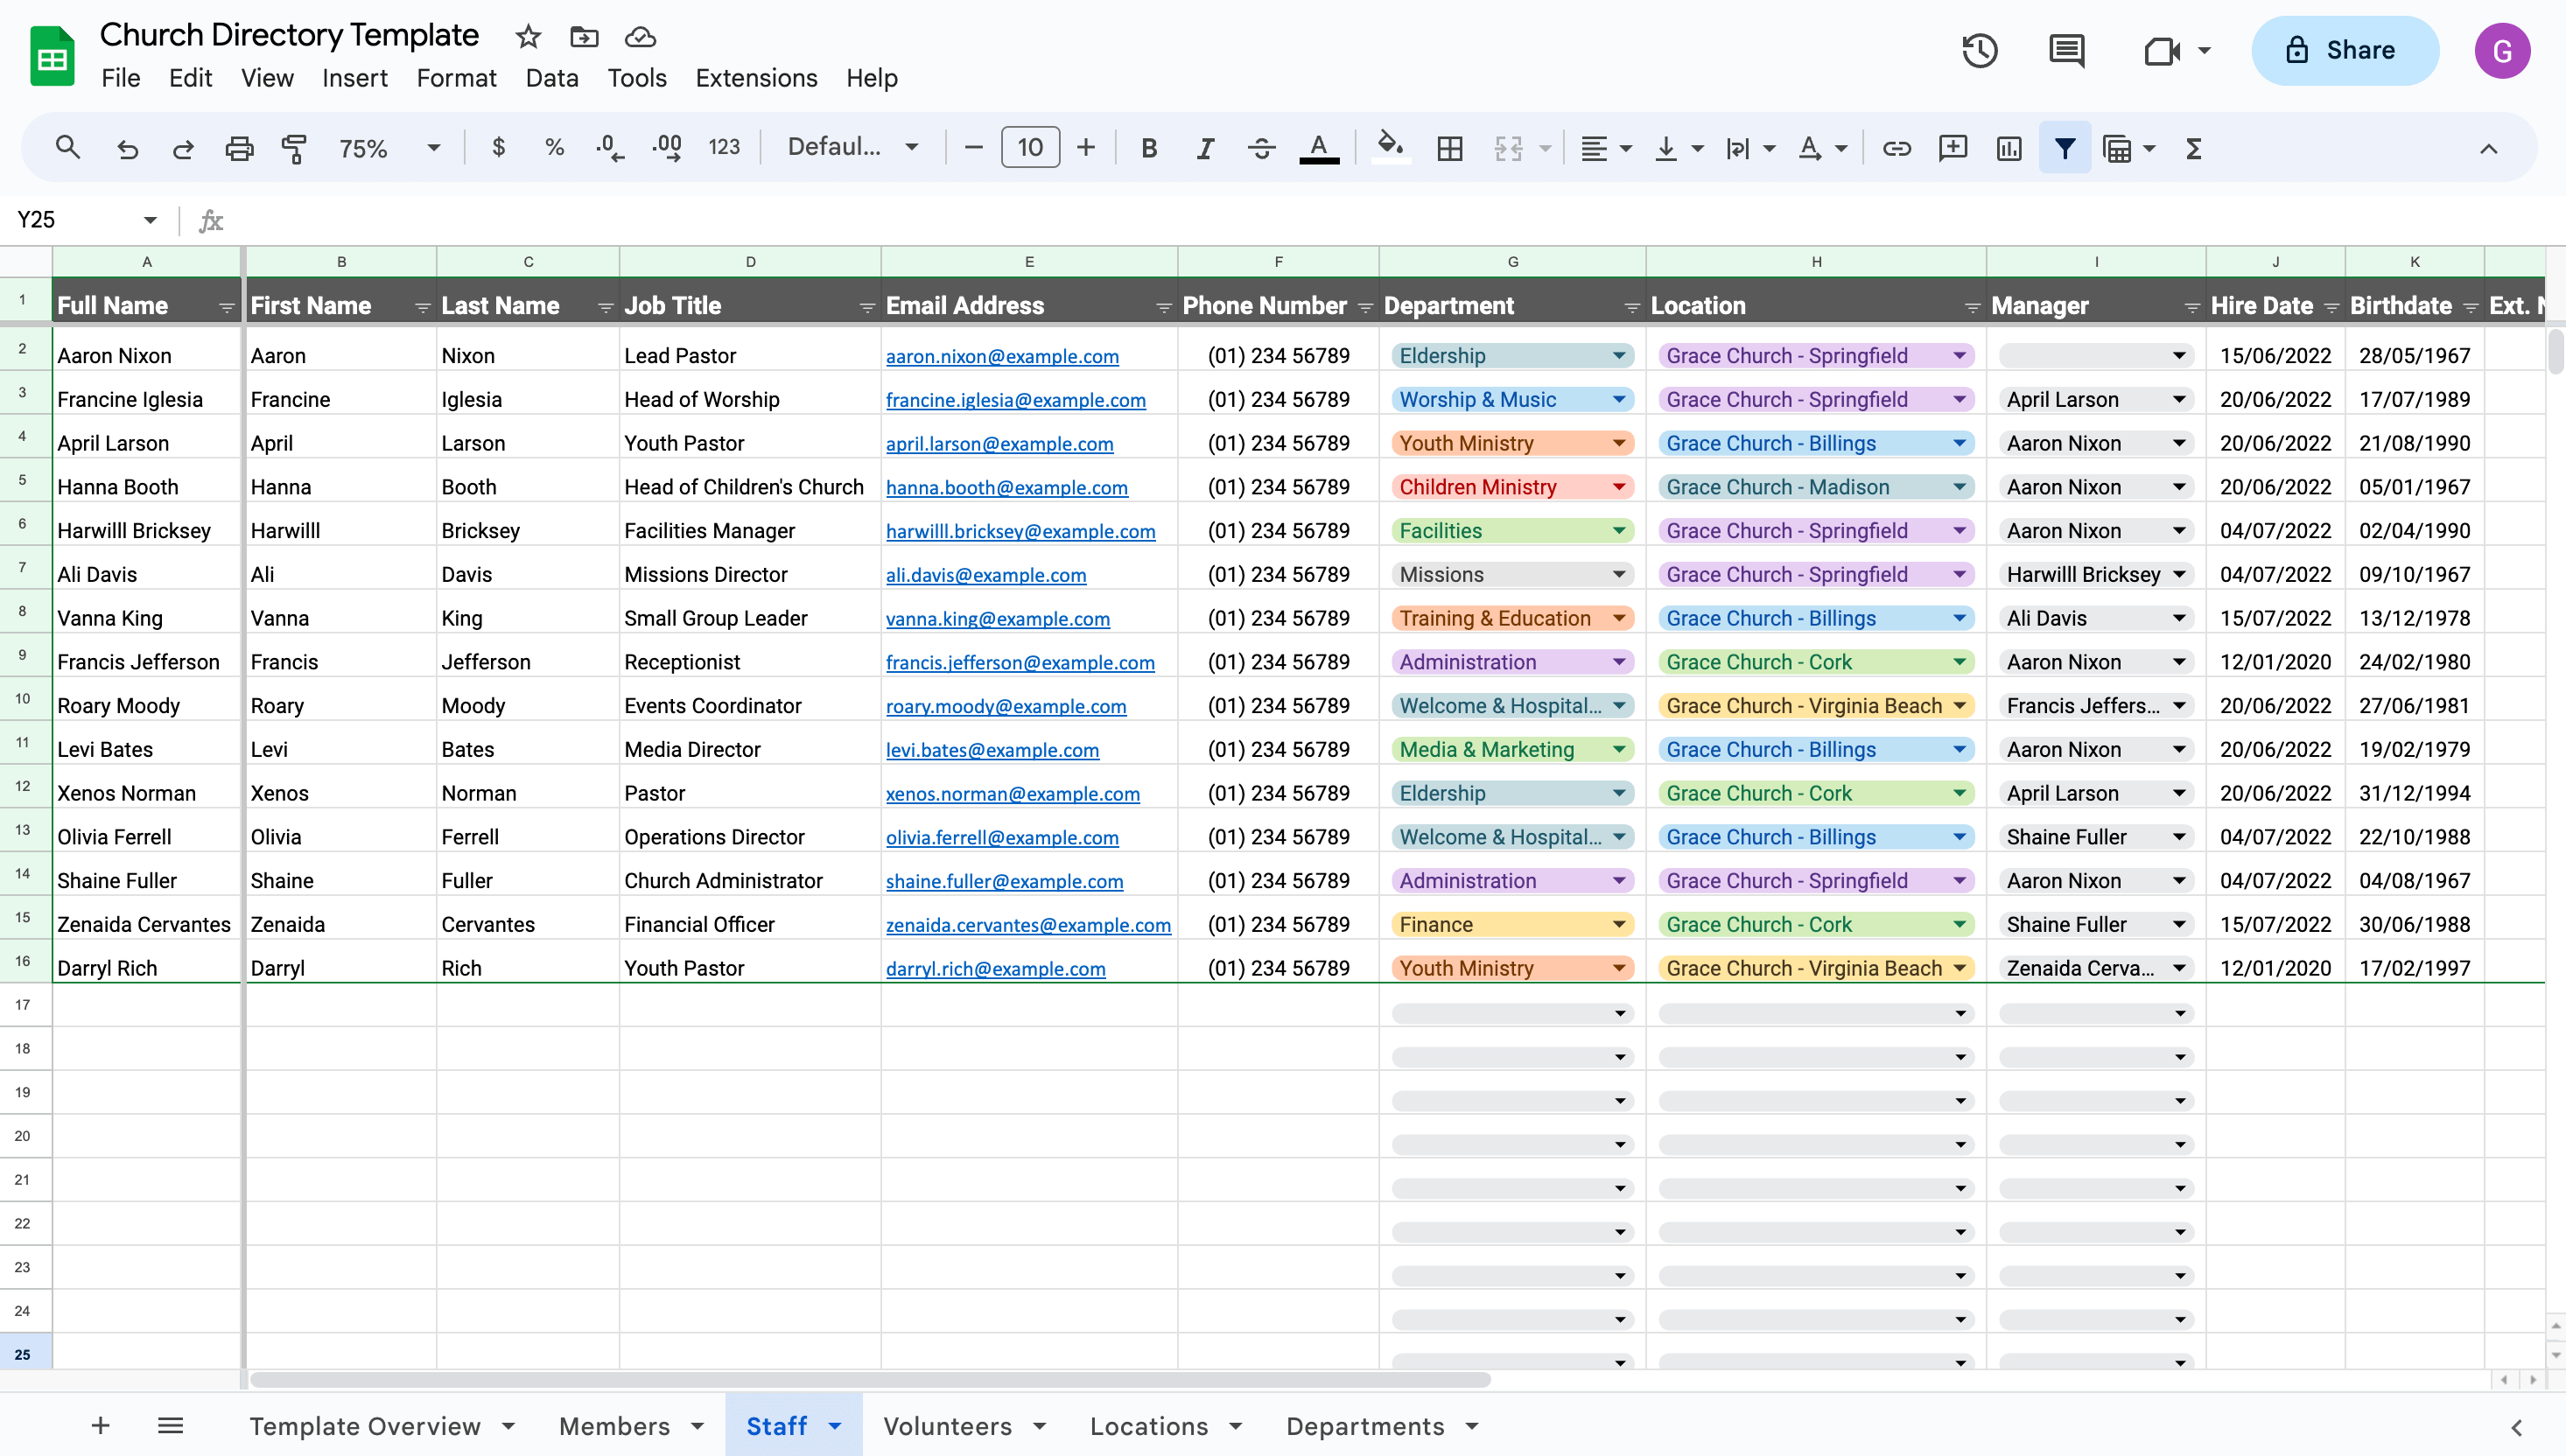
Step 3: Create a New Spreadsheet called "Staff Directory"
Create a new sheet and call it "Staff Directory". This is where you'll store all your staff's contact information and details.
Add Column Headers for your Staff Directory
- In cell A1 type "Full Name"
- In cell B1 type "First Name "
- In cell C1 type "Last Name"
- In cell D1 type "Job Title"
- In cell E1 type "Email Address"
- In cell F1 type "Phone Number"
- In cell G1 type "Department"
- In cell H1 type "Location"
- In cell I1 type "Manager"
- In cell J1 type "Hire Date"
- In cell K1 type "Birthdate"
This creates column headers for the key pieces of information you want to track for each staff member.
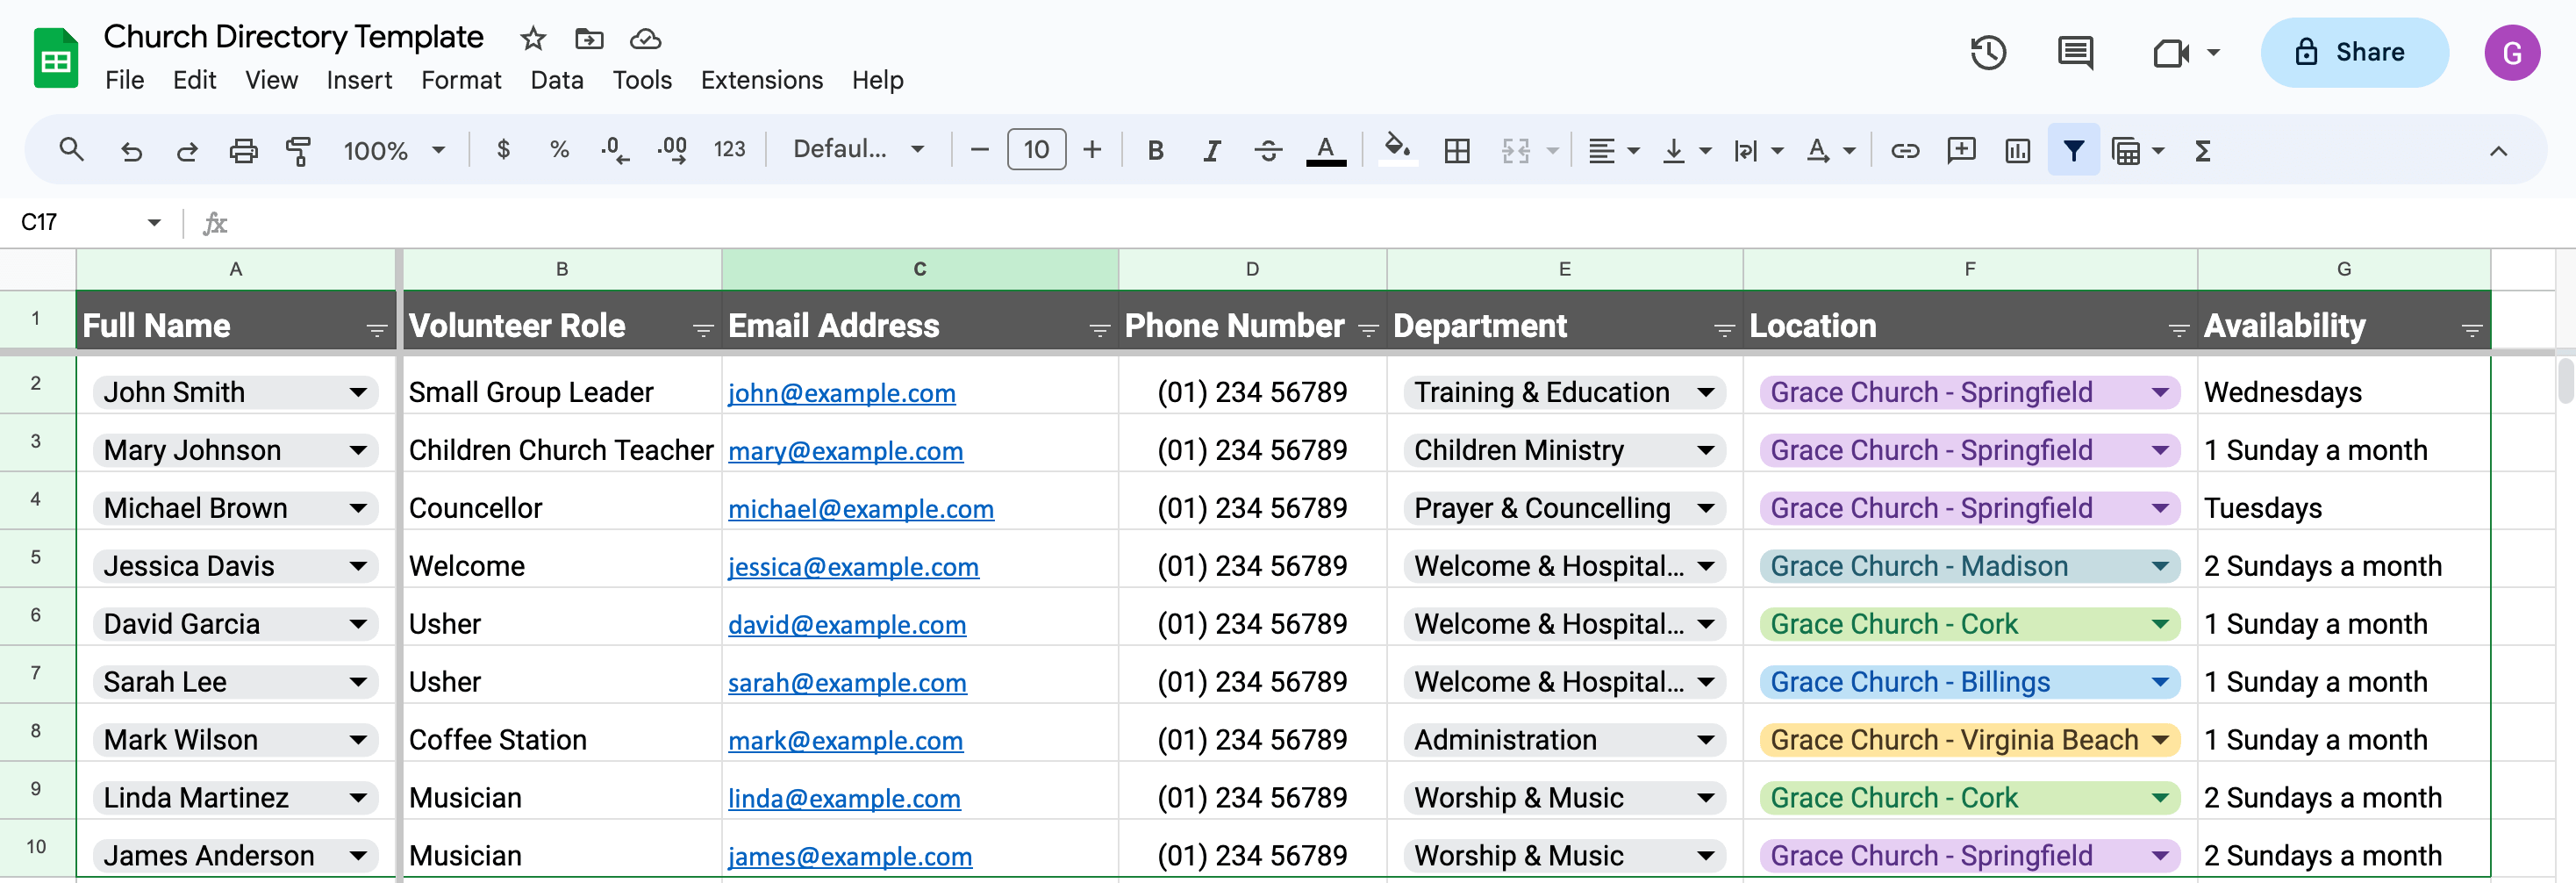
Step 4: Create a New Spreadsheet called "Volunteers"
- Create another new spreadsheet tab for your church volunteers.
- Title this one "Volunteers Directory".
Add Column Headers for Volunteers
- In cell A1 type "Full Name"
- In cell B1 type "Volunteer Role"
- In cell C1 type "Email Address"
- In cell D1 type "Phone Number"
- In cell E1 type "Department"
- In cell F1 type "Location"
- In cell G1 type "Availability"
This creates column headers for the key pieces of information you want to track for each volunteer.
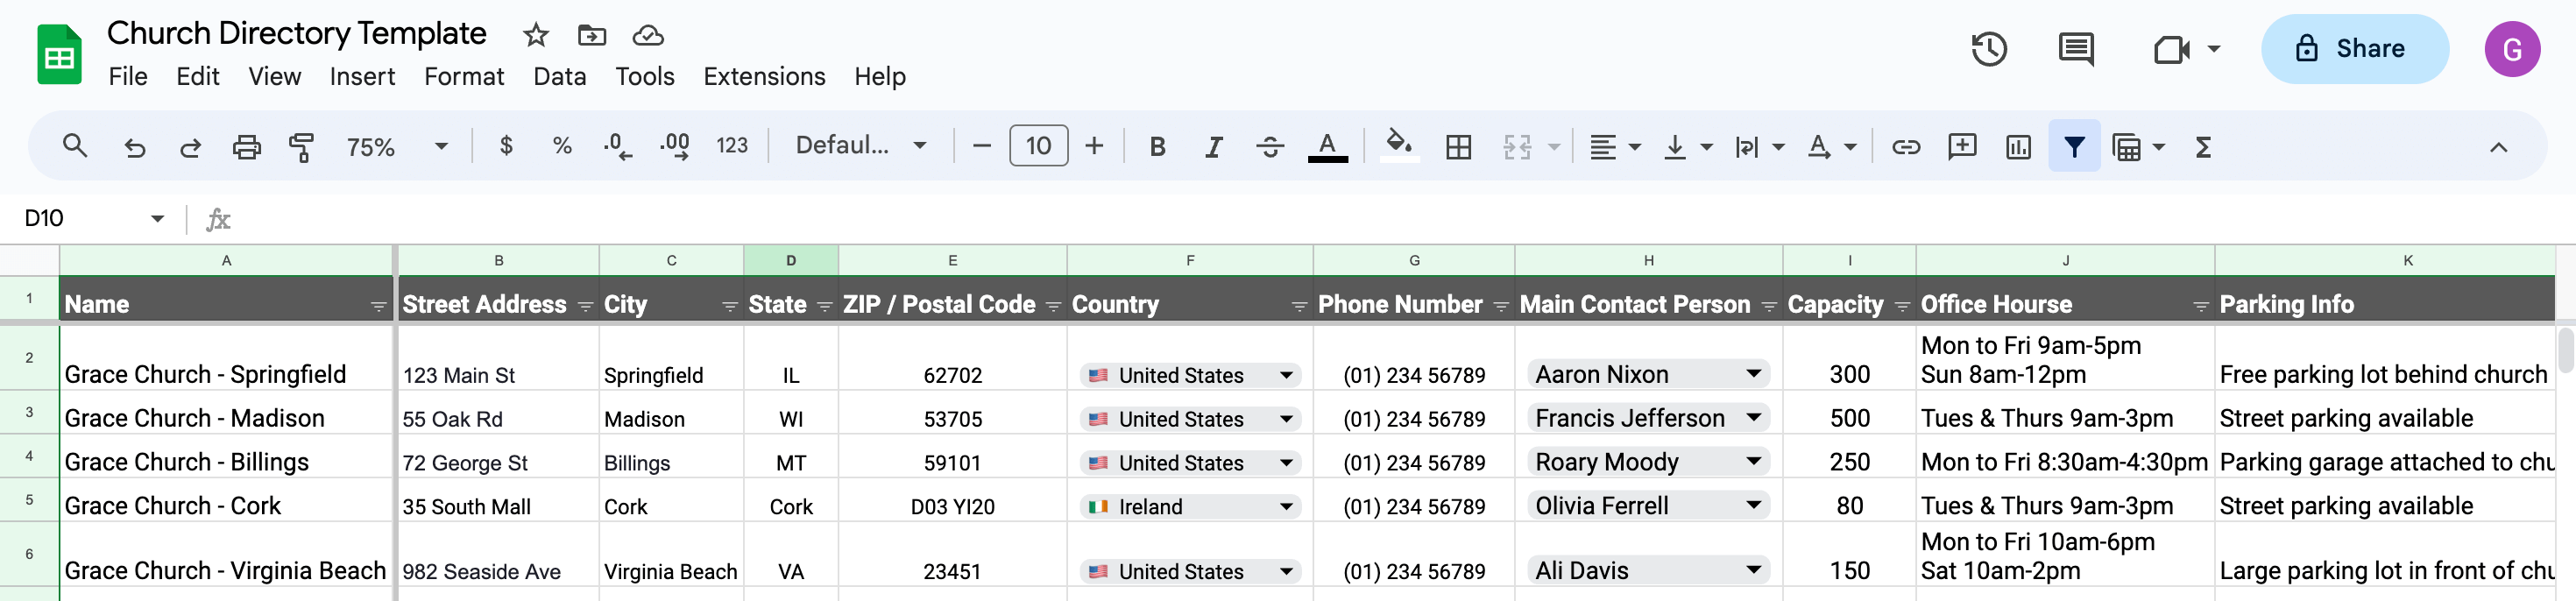
Step 5: Create a New Spreadsheet called "Locations"
- Make a new spreadsheet tab called "Locations" to track all your church campuses, buildings, and meeting places.
Add Column Headers for Locations Directory
- In cell A1 put "Location Name"
- In cell B1 put "Street Address"
- In cell C1 put "City"
- In cell D1 put "State"
- In cell E1 put "Country"
- In cell F1 put "ZIP / Postal Code"
- In cell G1 put "Phone Number"
- In cell H1 put "Main Contact Person"
- In cell I1 put "Capacity"
- In cell J1 put "Office Hours"
- In cell K1 put "Parking Info"
This gives you a directory of your different church locations.
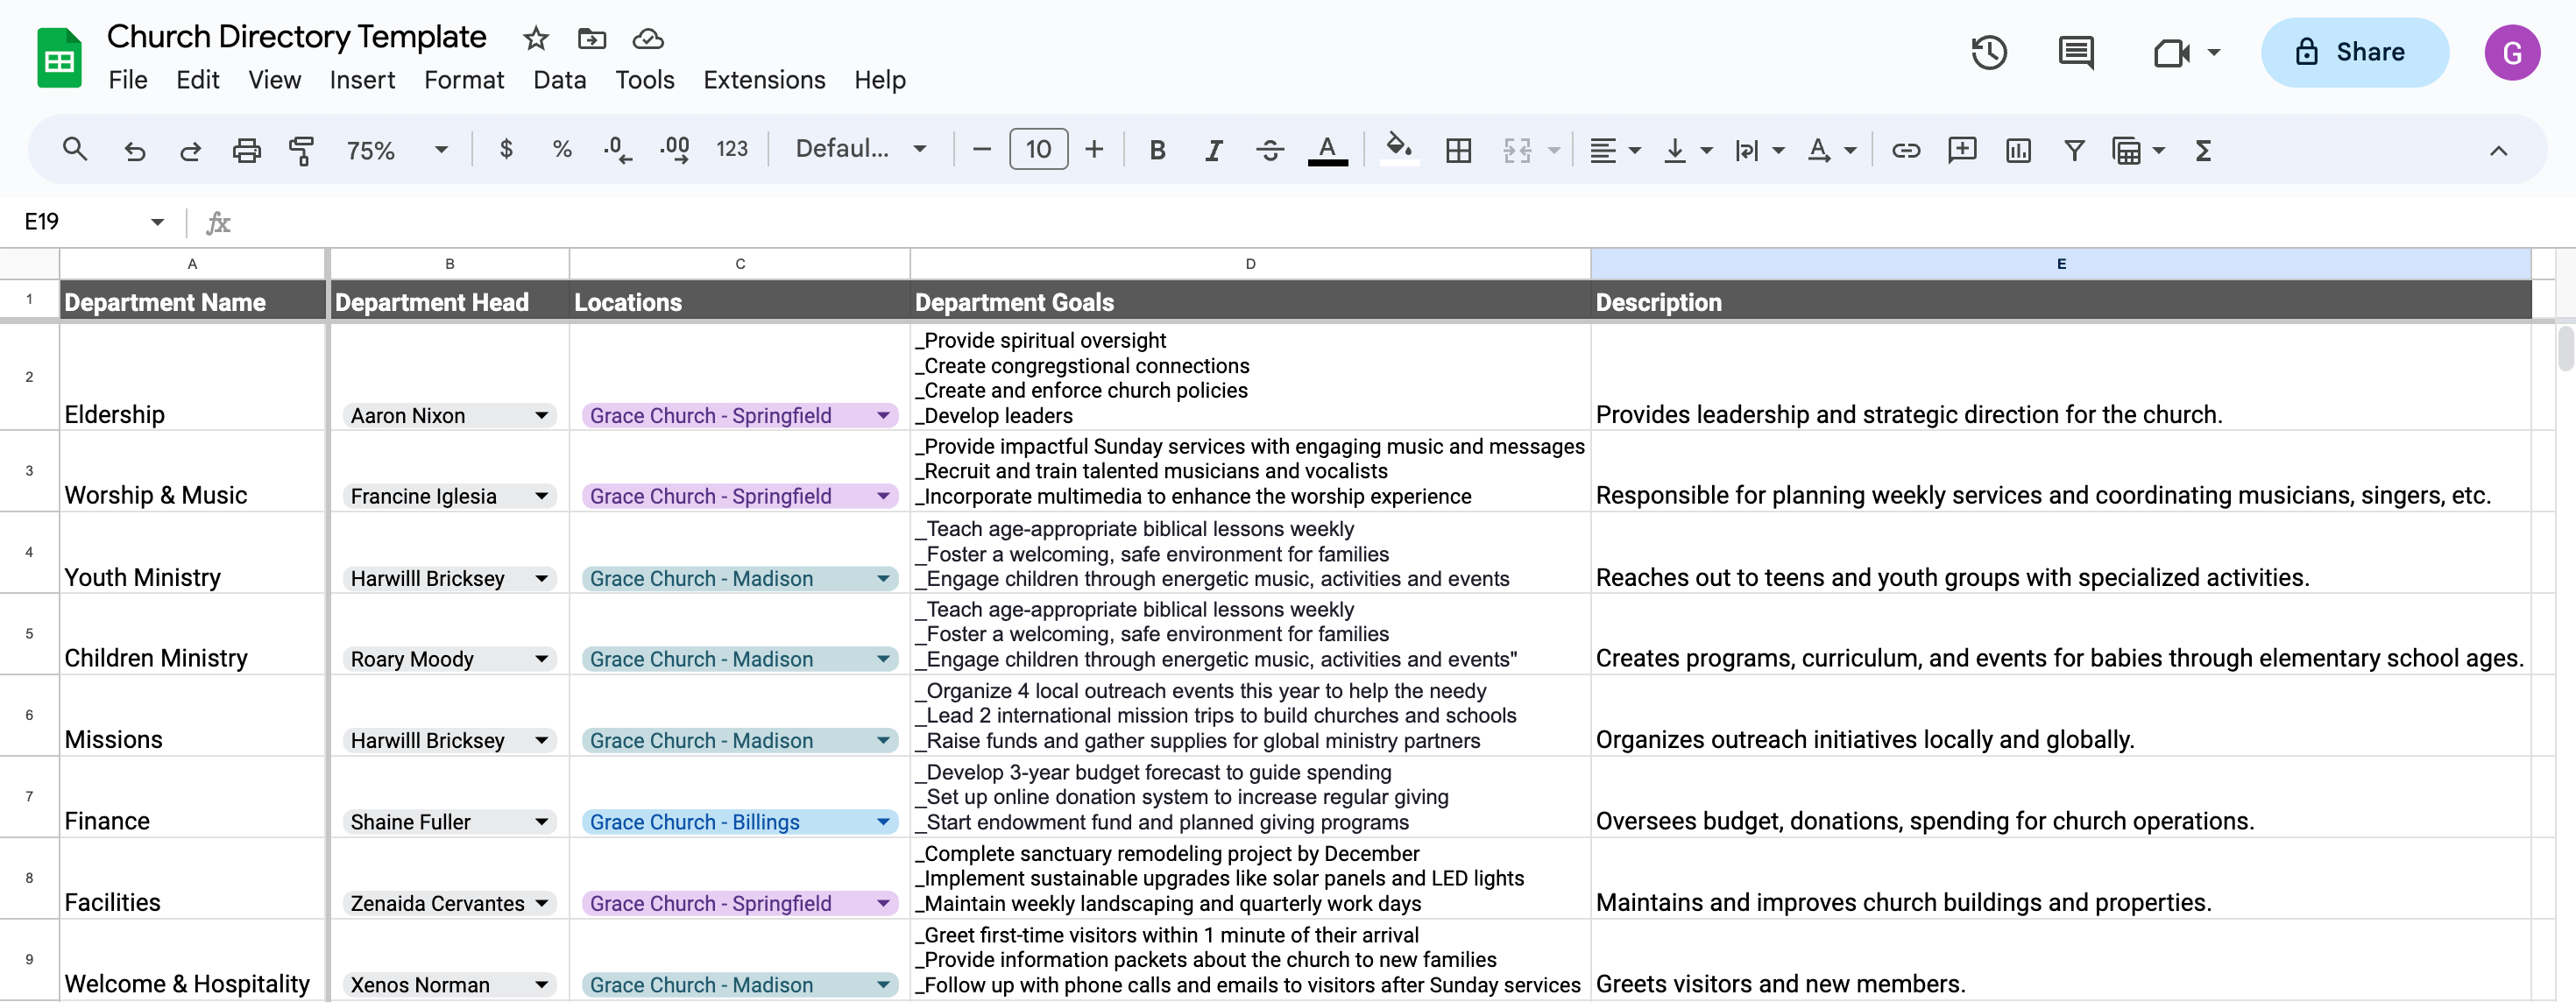
Step 6: Create a New Spreadsheet called "Departments"
Make a new spreadsheet tab called "Departments" to organize all your church departments in one place.
Add Column Headers for Departments Directory
- In cell A1 put "Department Name"
- In cell B1 put "Department Head"
- In cell C1 put "Locations"
- In cell D1 put "Department Goals"
- In cell E1 put "Description"
This gives you a directory of your different church departments.
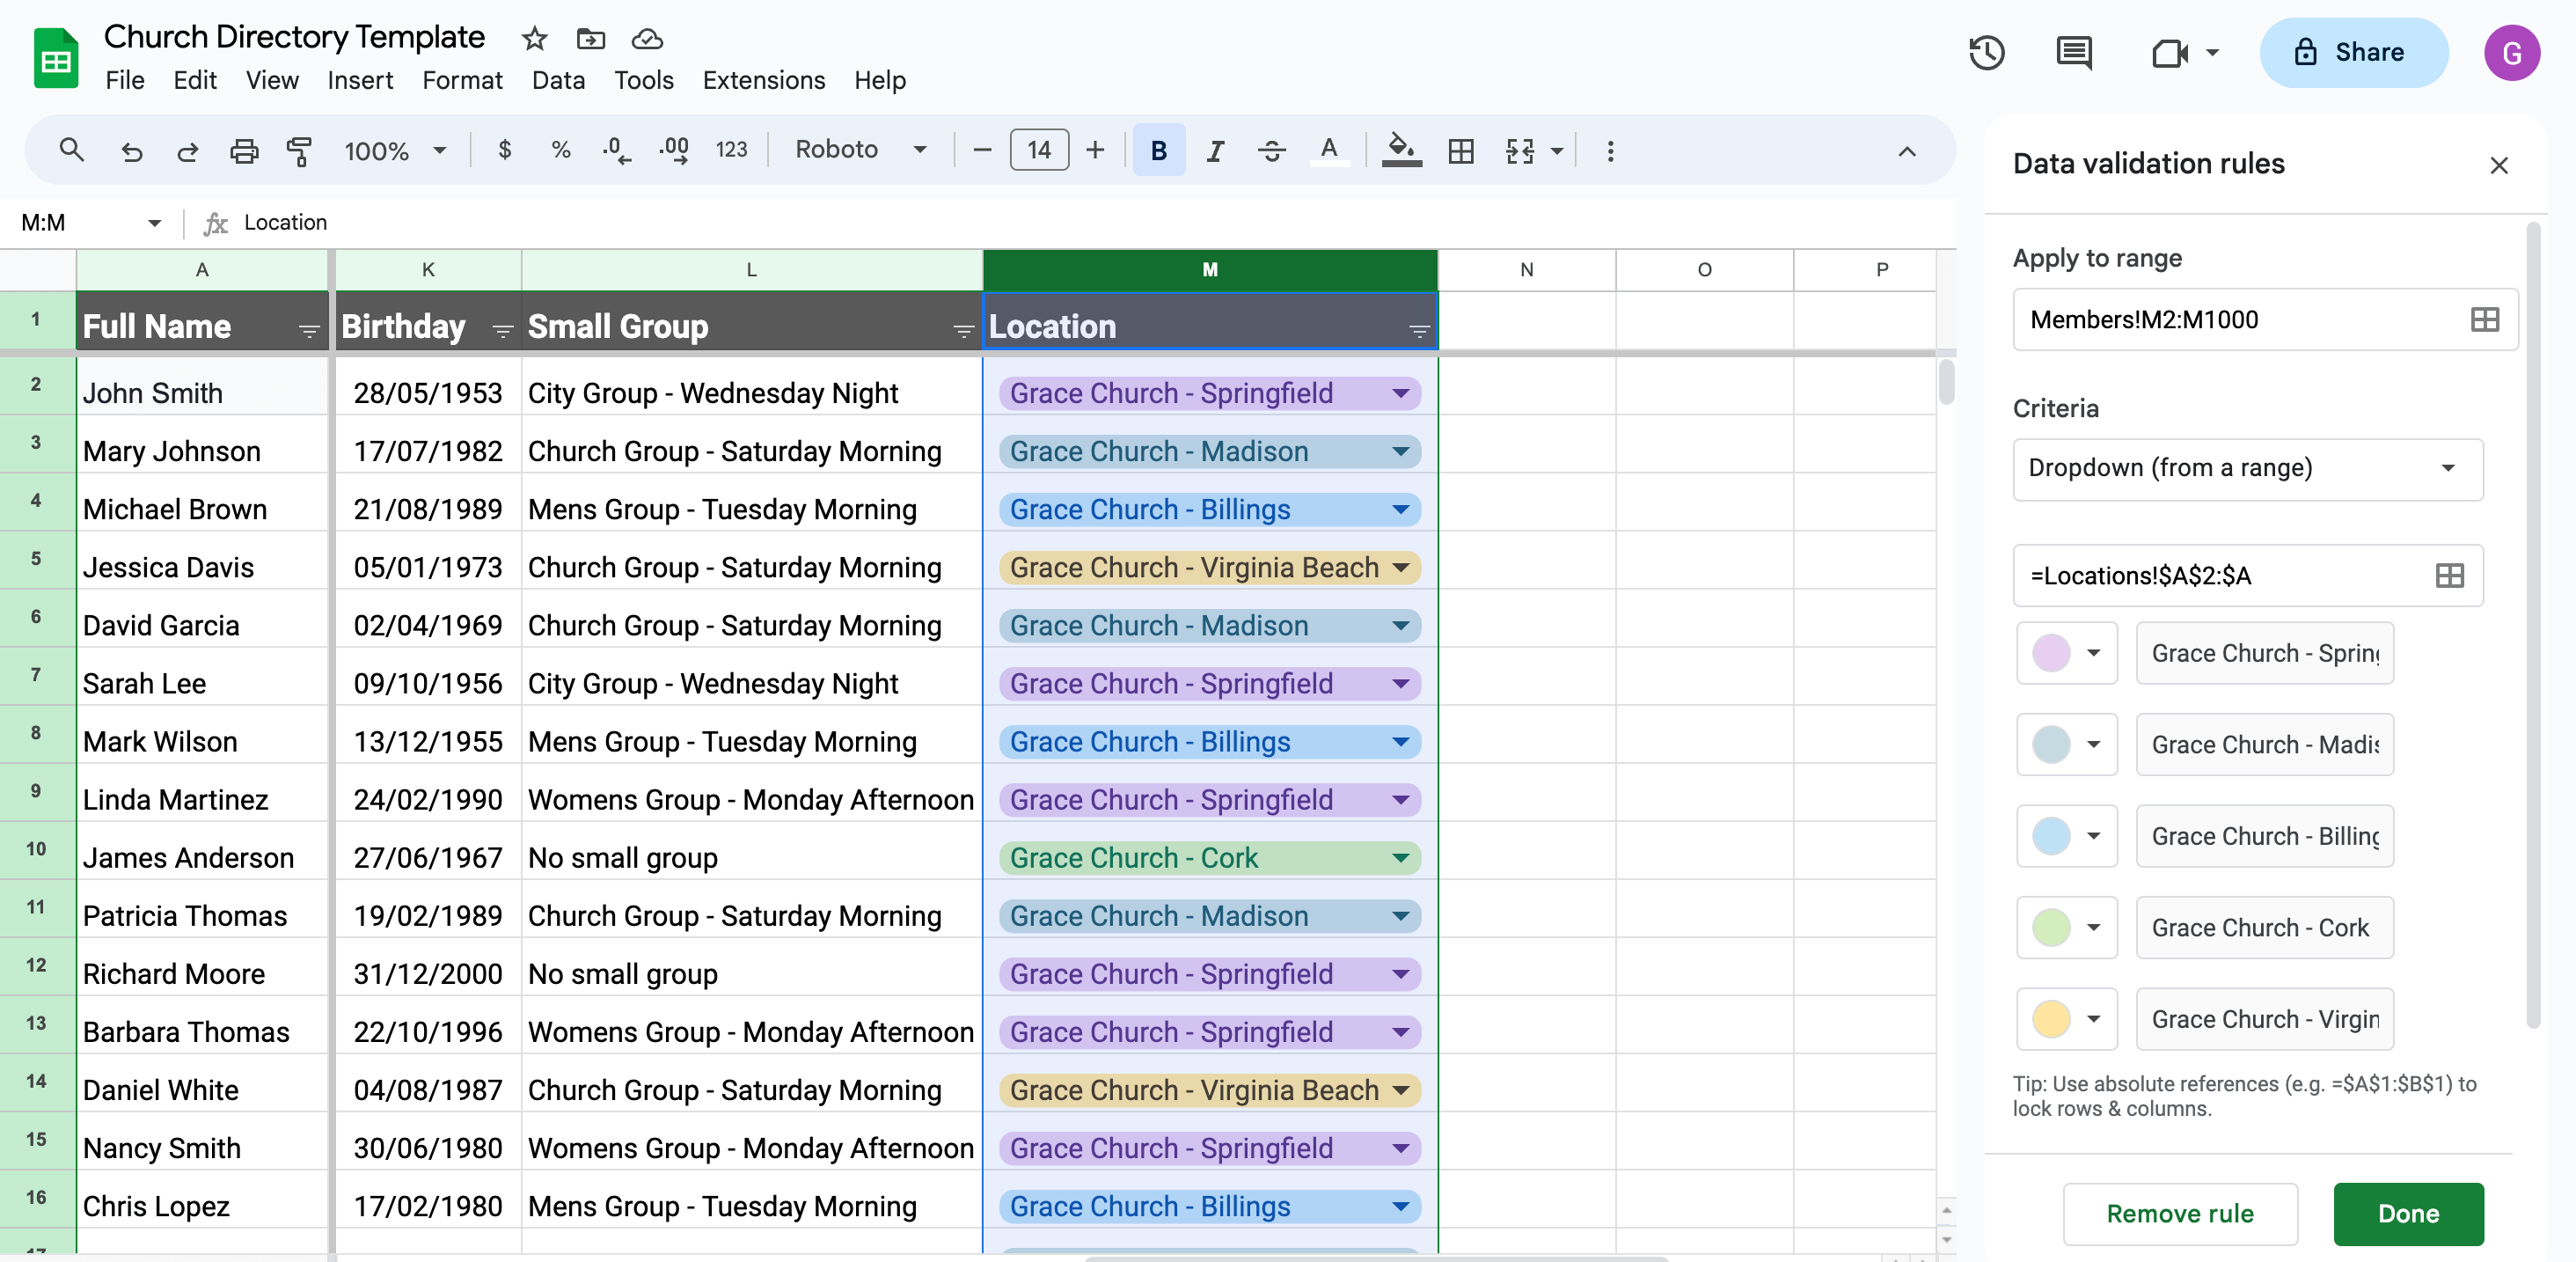
Step 7: Link Locations as a Dropdown in Staff, Members, and Volunteers Spreadsheets
Now you can link this new "Locations" sheet to the Staff, Members, and Volunteers Directory using data validation.
- Go back to the "Members" sheet
- Highlight the Locations column (Column M)
- Click Data > Data Validation > Add New Rule
- Apply to Range must = 'Members'!M2:N1000
- Under Criteria, select the 'Dropdown (from range)' option
- Then enter =Locations!A2:A
- Then click 'Done'
- Follow the same steps for the Staff and Volunteers directories
Step 8: Link Departments as a Dropdown in Staff and Volunteers Spreadsheets
Also use data validation to create drop-downs for "Departments", pulling from your "Departments" spreadsheet.
- Go back to the "Staff Directory" sheet
- Highlight the Department column (Column G)
- Click Data > Data Validation > Add New Rule
- Apply to Range must = 'StaffDirectory'!G2:G1000
- Under Criteria, select the 'Dropdown (from range)' option
- Then enter =Departments!A2:A
- Then click 'Done'
- Follow the same steps for the "Volunteers Directory"
Step 9: Add Department Data
- Starting in row 2, add a new row for each Department and fill in the data under the appropriate column headers.
- Make sure to use proper capitalization and formatting consistently.
Step 10: Add Locations Data
- Starting in row 2, add a new row for each Location and fill in the data under the appropriate column headers.
- Make sure to use proper capitalization and formatting consistently.
Step 11: Add Member Data
- Starting in row 2, add a new row for each Member and fill in the data under the appropriate column headers.
- Make sure to use proper capitalization and formatting consistently.
- For phone numbers, use (XXX) XXX-XXXX format. (see How to Format Fields for Phone Numbers at the end of the guide)
- For birthdate or join date, use MM/DD/YYYY format. (see How to Format Date Fields at the end of the guide)
Step 12: Add Staff Data
- Starting in row 2, add a new row for each staff member and fill in the data under the appropriate column headers.
- Make sure to use proper capitalization and formatting consistently.
- For phone numbers, use (XXX) XXX-XXXX format. (see How to Format Fields for Phone Numbers at the end of the guide)
- For hire date and birthdate, use MM/DD/YYYY format. (see How to Format Date Fields at the end of the guide)
Step 13: Add Volunteer Data
- Starting in row 2, add a new row for each volunteer and fill in the data under the appropriate column headers.
- Make sure to use proper capitalization and formatting consistently.
Step 14: Filtering & Formatting
Make your directory easy to navigate by adding filters and formatting.
- Filter by location, department, or alphabetically
- Sort columns by last name or date
- Highlight header rows
- Bold names
- Wrap text
- Set column widths
To make your Google Sheets church directory more user-friendly, you can add filters that allow us to quickly search, sort, and filter the data.
- Highlight the entire header row.
- Click Data > Filter views. This will add dropdown filters to each header.
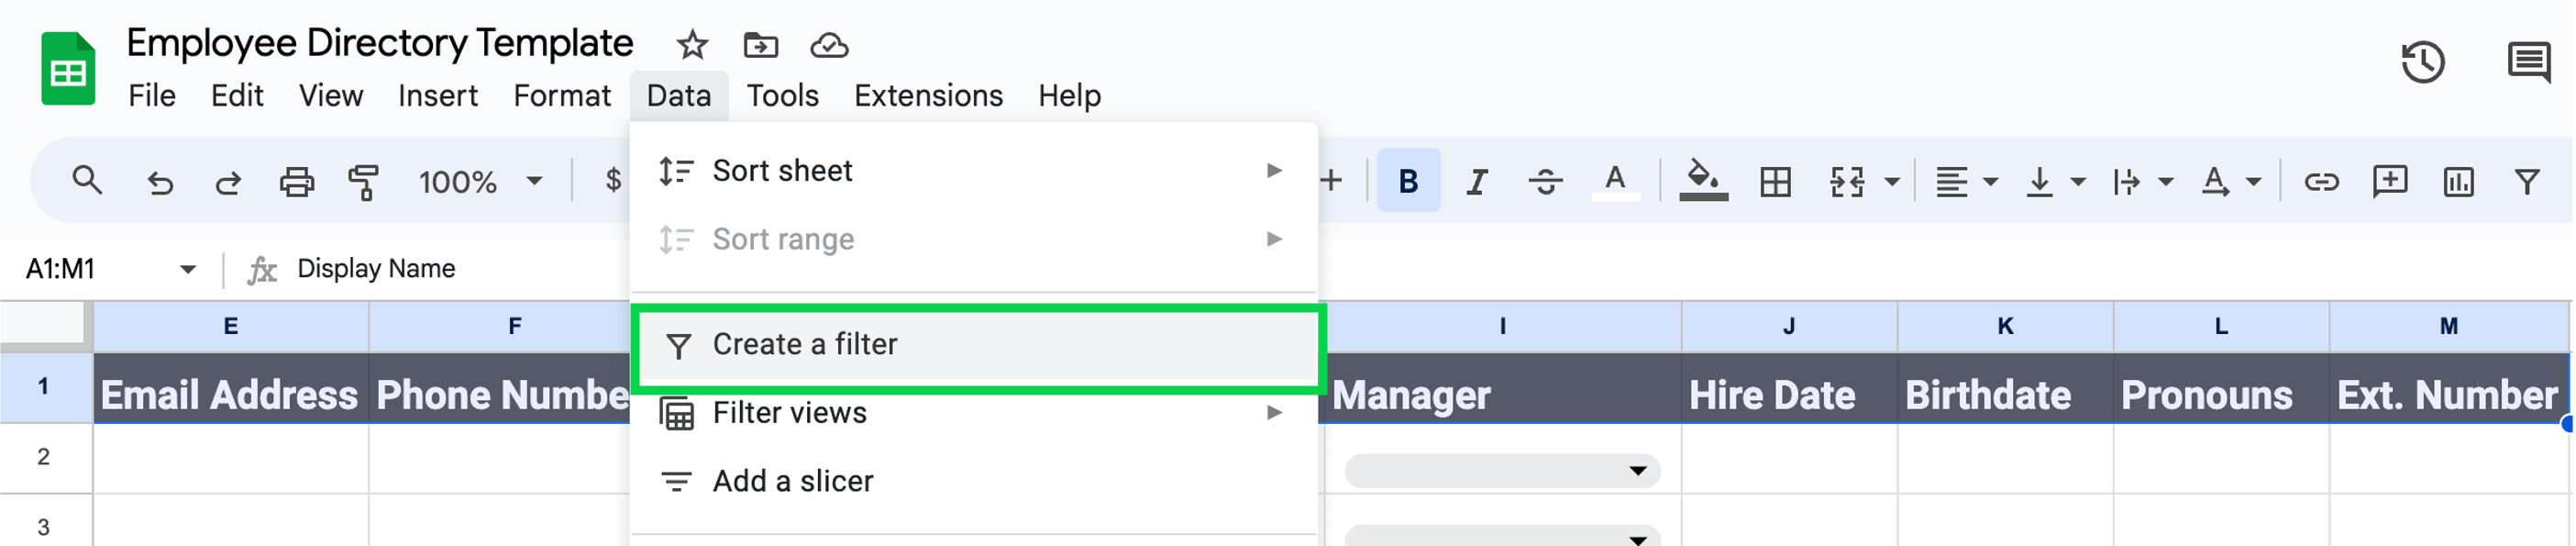
Now you can easily filter by department, role, start date, etc.
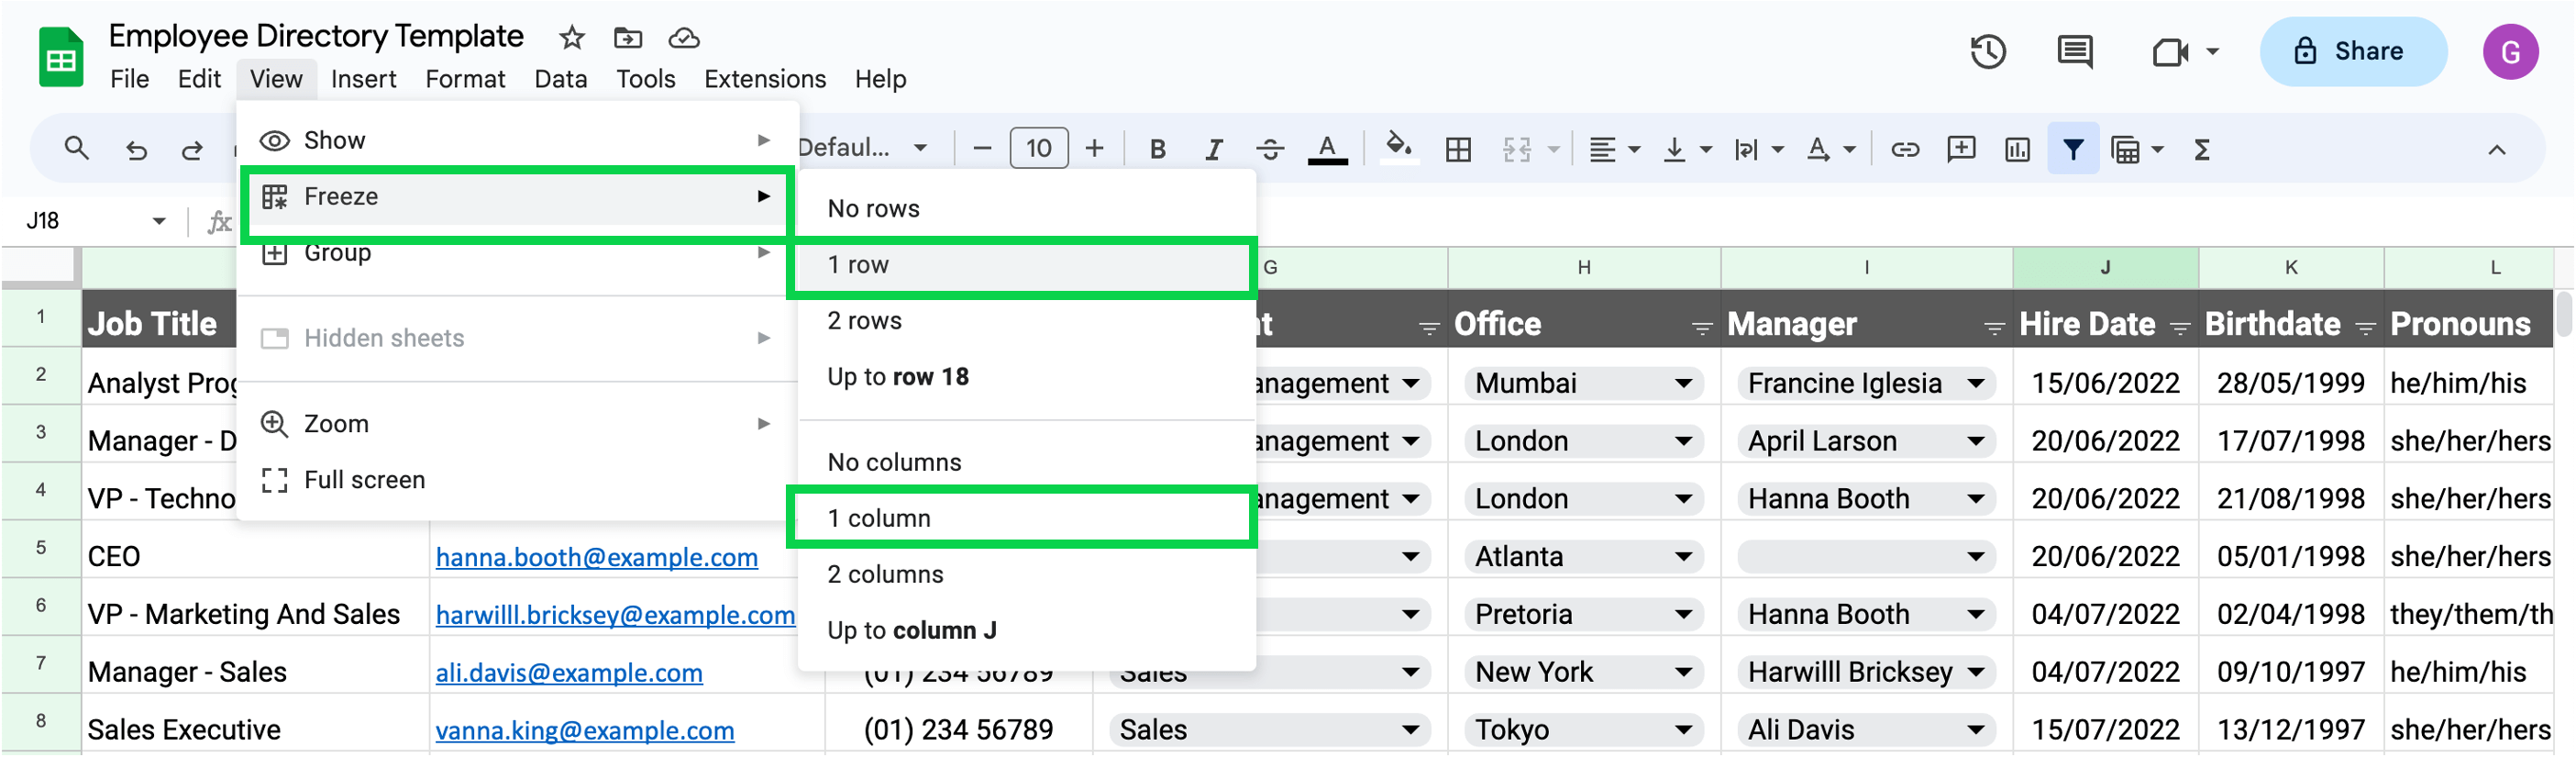
To make your Google Sheets church directory easier to navigate freeze the header and first column row on all sheets:
- With the header row still highlighted, click View > Freeze.
- Then choose Freeze '1 row'.
- Then click View > Freeze again.
- Then choose Freeze '1 column'
Step 15: Save and Share Your Church Directory
Finally, save your Sheets file. Share access with church staff who need to view or edit it. Make sure confidential info is only visible to those who need it.
- To enable access: Click the Share button > Add people/groups and enter email addresses.
- Choose editor or viewer permissions.
- Click Send to complete sharing.
And that's it!
With these comprehensive steps, you can create a robust church directory in Google Sheets to organize and connect your congregation.
Additional Tips
Here are a few additional tips for enhancing your church directory in Google Sheets:
How to Format Fields for Phone Numbers in Google Sheets
- For consistent formatting, use the (XXX) XXX-XXXX phone number format
- Apply this format to all existing phone numbers using the Find and Replace tool (Ctrl + H on Windows/ChromeOS, ⌘ + F on Mac)
- For new entries, use Data Validation to select between a pre-defined list of phone number formats, like:
- (XXX) XXX-XXXX
- XXX-XXX-XXXX
- +1 (XXX) XXX-XXXX
- +1 XXX-XXX-XXXX
How to Format Date Fields in Google Sheets
- For consistent formatting, use the MM/DD/YYYY date format
- Apply this format to existing dates using Find and Replace (Ctrl + H or ⌘ + F)
- For new entries, use Data Validation to select from a pre-defined list of date formats like:
- MM/DD/YYYY
- DD/MM/YYYY
- MM/DD/YY
- YYYY-MM-DD
- This ensures all dates follow the same style for better organization
Get Your Free Instant Church Directory Template
As you can see from all the steps above creating a church directory from scratch in Google Sheets can be time-consuming.
Luckily, we have a free instant church directory template for you that can give you a head start.
Access your free instant church directory template here.